Background: Introduction to geopandas and cartopy#
Copyright (c) 2022-2024, Fabian Neumann
Basic Setup#
Again, we will be using pandas and matplotlib in this tutorial.
import pandas as pd
import matplotlib.pyplot as plt
Note
If you have not yet set up Python on your computer, you can execute this tutorial in your browser via Google Colab. Click on the rocket in the top right corner and launch “Colab”. If that doesn’t work download the .ipynb file and import it in Google Colab.
Then install the following packages by executing the following command in a Jupyter cell at the top of the notebook.
!pip install pandas geopandas matplotlib cartopy mapclassify
Why do we need something other than pandas?#
Let’s reload again our example dataset of conventional power plants in Europe as a pd.DataFrame.
fn = "https://raw.githubusercontent.com/PyPSA/powerplantmatching/master/powerplants.csv"
ppl = pd.read_csv(fn, index_col=0)
This dataset includes coordinates (latitude and longitude), which allows us to plot the location and capacity of all power plants in a scatter plot:
ppl.plot.scatter("lon", "lat", s=ppl.Capacity / 1e3)
However, this graphs misses some geographic reference point, we’d normally expect for a map like shorelines, country borders etc.
Geopandas - a Pandas extension for geospatial data#
Geopandas extends pandas by adding support for geospatial data.
The core data structure in GeoPandas is the geopandas.GeoDataFrame, a subclass of pandas.DataFrame, that can store geometry columns and perform spatial operations.

Note
Documentation for this package is available at https://geopandas.org/en/stable/.
Typical geometries are points, lines, and polygons. They come from another library called shapely, which helps you create, analyze, and manipulate two-dimensional shapes and their properties, such as points, lines, and polygons.

First, we need to import the geopandas package. The conventional alias is gpd:
import geopandas as gpd
We can convert the latitude and longitude values given in the dataset to formal geometries (to be exact: shapely.Point objects but we won’t go into detail regarding this) using the gpd.points_from_xy() function, and use this to gpd.GeoDataFrame. We should also specify a so-called coordinate reference system (CRS). The code ‘4326’ means latitude and longitude values.
geometry = gpd.points_from_xy(ppl["lon"], ppl["lat"])
gdf = gpd.GeoDataFrame(ppl, geometry=geometry, crs=4326)
Now, the gdf looks like this:
gdf.head(3)
With the additional geometry columns, it is now even easier to plot the geographic data:
gdf.plot(
    column="Fueltype",
    markersize=gdf.Capacity / 1e2,
)
We can also start up an interactive map to explore the geodata in more detail:
gdf.explore(column="Fueltype")
Map Projections with Cartopy#
Cartopy is a Python package designed for geospatial data processing and has exposed an interface to enable easy map creation using matplotlib.
The Earth is a globe, but we present maps usually on two-dimensional surfaces. Hence, we typically need to project data points onto flat surfaces (e.g. screens, paper). However, we will always loose some information in doing so.
A map projection is:
a systematic transformation of the latitudes and longitudes of locations from the surface of a sphere or an ellipsoid into locations on a plane. Wikipedia: Map projection.
Different projections preserve different metric properties. As a result, converting geodata from one projection to another is a common exercise in geographic data science.
conformal projections preserve angles/directions (e.g. Mercator projection)
equal-area projections preserve area measure (e.g. Mollweide)
equidistant projections preserve distances between points (e.g. Plate carrée)
compromise projections seek to strike a balance between distortions (e.g. Robinson)
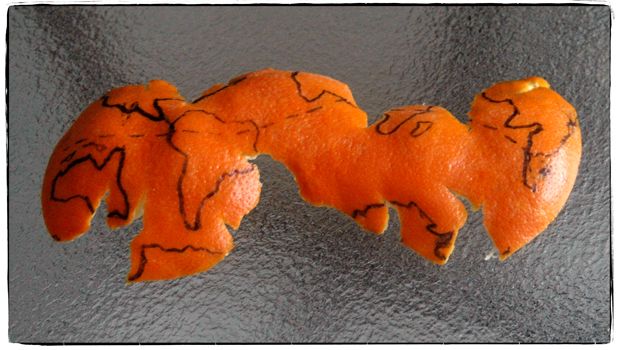
If you like the “Orange-as-Earth” analogy for projections, checkout this numberphile video by Hannah Fry.
Note
Documentation for this package is available at https://scitools.org.uk/cartopy/docs/latest/.
First, we need to import the relevant parts of the cartopy package:
import cartopy
import cartopy.crs as ccrs
Let’s draw a first map with cartopy outlining the global coastlines in the so-called plate carrée projection (equirectangular projection):
ax = plt.axes(projection=ccrs.PlateCarree())
ax.coastlines()
A list of the available projections can be found on the Cartopy projection list page.
ax = plt.axes(projection=ccrs.Mollweide())
ax.stock_img()
We can combine the functionality of cartopy with geopandas plots:
fig = plt.figure(figsize=(7, 7))

ax = plt.axes(projection=ccrs.PlateCarree())

gdf.plot(
    ax=ax,
    column="Fueltype",
    markersize=gdf.Capacity / 1e2,
)
We can add further geographic features to this map for better orientation.
For instance, we can add the coastlines…
ax.coastlines()
fig
… country borders …
ax.add_feature(cartopy.feature.BORDERS, color="grey", linewidth=0.5)
fig
… colour in the ocean in blue …
ax.add_feature(cartopy.feature.OCEAN, color="azure")
fig
…and color in the land area in yellow …
ax.add_feature(cartopy.feature.LAND, color="cornsilk")
fig
Geopandas will automatically calculate sensible bounds for the plot given the geographic data.
But we can also manually zoom in or out by setting the spatial extent with the .set_extent() method:
ax.set_extent([5, 16, 47, 55])
fig
Reprojecting a GeoDataFrame#
In geopandas, we can use the function .to_crs() to convert a GeoDataFrame to a desired coordinate reference system. In this particular case, we use the proj4_init string of an initialised cartopy projection to reproject our power plant GeoDataFrame.
A
proj4_initstring is a text-based representation of a coordinate reference system (CRS) that defines the parameters for transforming geographical coordinates between different spatial reference systems, used by the PROJ library. It will look similar to this: “+proj=longlat +ellps=WGS84 +datum=WGS84 +no_defs”.
fig = plt.figure(figsize=(7, 7))

crs = ccrs.AlbersEqualArea()

ax = plt.axes(projection=crs)

gdf.to_crs(crs.proj4_init).plot(
    ax=ax,
    column="Fueltype",
    markersize=gdf.Capacity / 1e2,
)

ax.coastlines()
Reading and Writing Files with geopandas#
In the following example, we’ll load a dataset containing the NUTS regions:
Nomenclature of Territorial Units for Statistics or NUTS (French: Nomenclature des unités territoriales statistiques) is a geocode standard for referencing the subdivisions of countries for statistical purposes.
Our ultimate goal for this part of the tutorial is to map the power plant capacities to the NUTS-1 region they belong to.
Common filetypes for vector-based geospatial datasets are GeoPackage (.gpkg), GeoJSON (.geojson), File Geodatabase (.gdb), or Shapefiles (.shp).
In geopandas we can use the gpd.read_file() function to read such files. So let’s start:
url = "https://tubcloud.tu-berlin.de/s/RHZJrN8Dnfn26nr/download/NUTS_RG_10M_2021_4326.geojson"
nuts = gpd.read_file(url)
nuts.head(3)
It is good practice to set an index. You can use .set_index() for that:
nuts = nuts.set_index("id")
We can also check out the geometries in the dataset with .geometry:
nuts.geometry
With .crs we can check in which coordinate reference system the data is given:
nuts.crs
nuts.total_bounds
Let’s filter by NUTS-1 level…
nuts1 = nuts.query("LEVL_CODE == 1")
… and explore what kind of geometries we have in the dataset …
nuts1.explore()
To write a GeoDataFrame back to file use GeoDataFrame.to_file(). The file format is inferred from the file ending.
nuts1.to_file("tmp.geojson")
Calculating the areas and buffers#
The first thing we need to do to calculate area or buffers is to reproject the GeoDataFrame to an equal-area projection (here: EPSG:3035 which is valid only within Europe; global alternative is the Mollweide projection EPSG:54009):
nuts1 = nuts1.to_crs(3035)
The area can be accessed via .area and is given in m² (after projection). Let’s convert to km²:
area = nuts1.area / 1e6
area
nuts1.explore(column=area, vmax=1e5)
We can also build a buffer of 1km around each geometry using .buffer():
nuts1.buffer(1000).explore()
Joining spatial datasets#
Multiple GeoDataFrames can be combined via spatial joins.
Observations from two datasets are combined with the .sjoin() function based on their spatial relationship to one another (e.g. whether they are intersecting or overlapping). You can read more about the specific options here.
To perform a spatial join, you need to provide the following information:
The two GeoDataFrames you want to join (e.g.,
left_dfandright_df).The type of spatial relationship to test (e.g.,
intersects,contains,within). This is specified using theopparameter.The type of join to perform (e.g.,
inner,left,right). This is specified using thehowparameter.
The .sjoin() function will then iterate through the geometries in both GeoDataFrames, evaluate the specified spatial relationship, and join the matching records.
For example, if the op parameter is set to ‘intersects’, the function will check if the geometries of each record in left_df intersect with the geometries of any records in right_df. If a match is found, the attributes of the corresponding records from both GeoDataFrames will be combined into a new record in the output GeoDataFrame.
By performing spatial joins, you can efficiently combine and analyze geospatial data based on their spatial relationships, without the need for explicit coordinate-based calculations.
Let’s first reproject the gdf object to the same CRS as nuts1:
gdf = gdf.to_crs(3035)
Then, let’s have a look at both datasets at once. We want to find out which points (representing power plants) lie within which shape (representing NUTS regions).
fig = plt.figure(figsize=(7, 7))

ax = plt.axes(projection=ccrs.epsg(3035))

nuts1.plot(ax=ax, edgecolor="black", facecolor="lightgrey")

gdf.to_crs(3035).plot(
    ax=ax, column="Fueltype", markersize=gdf.Capacity / 20, legend=True
)

ax.set_extent([5, 19, 47, 55])
We can now apply the .sjoin function to look for which power plants lie within which NUTS1 region. By default, sjoin looks for intersections and keeps the geometries of the left GeoDataFrame.
joined = gdf.sjoin(nuts1)
If we look at this new GeoDataFrame, we now have additional columns from the NUTS1 data:
joined.head(3)
We can now use these new columns to group the capacities (and convert to a suitable unit):
cap = joined.groupby("NUTS_ID").Capacity.sum() / 1000 # GW
Let’s quickly check if all NUTS1 regions have power plants:
nuts1.index.difference(cap.index)
This is not the case. Then it is good practice to reindex the series to include all NUTS1 regions, even if this leads to some NaN values.
cap = cap.reindex(nuts1.index)
cap
Finally, we can plot the total generation capacity per NUTS1 region on a map.
nuts1.plot(figsize=(7, 7), column=cap, legend=True)
This concludes the geopandas and cartopy tutorial.
Exercises#
Task 1: Recreate the figure above (i.e. generation capacity per NUTS1 region)
using 3 different cartopy projections of your choice.
such that the capacities are normalised by the area of the NUTS1 region (unit: MW/km²).
such that it only shows the hard coal power plant capacities.
such that it only shows NUTS1 shapes for Germany (and Denmark).
but with NUTS2 regions instead of NUTS1 regions.
(advanced) such that it shows the capacity-weighted average age of the power plants instead of the capacities. Where are the oldest generators? Can you think of a reason why?
Which German NUTS2 region has the highest conventional generation capacity? Can you think of a reason why?
Three projections of choice:
Normalised by area in MW/km²:
Only hard coal generators:
Only Germany:
Only Germany and Denmark:
In NUTS2 rather than NUTS1:
NUTS2 region with highest capacity:
Capacity-weighted average age:
Task 2: Load the following .gpkg file containing the Danish Natura2000 natural protection areas as GeoDataFrame:
https://tubcloud.tu-berlin.de/s/mEpdmgBtmMbyjAr/download/Natura2000_end2021-DK.gpkg
How many individual natural protection areas are there?
What is the name of the largest natural protection area in Denmark?
What is the total protection area in square kilometers (make sure you don’t double-count overlapping areas by running the
.dissolve()function).(advanced) Use set operations with the
.overlay()function and the NUTS1 regionsGeoDataFrameto identify what share of Danish natural protection areas is at sea.
How many:
Name of largest protection area:
Total area in km²:
Share of natural protection area offshore: